Managing User Permissions - RBAC
👤 This documentation is intended for Site Administrators.
Note: Site Admins should refer to the Managing User Permissions documentation for customers that do not have Role-Based Access Control (RBAC) enabled.
User Roles let Admins manage their users' view and edit permissions easily. Admins can quickly set up different user types by modifying the user roles that users belong to and the settings of those roles.
<div>
<UL>
<LI><a href="#ManagingOverview">Managing Permissions Overview</a></LI>
<LI><a href="#RolePermission">Default User Roles</a></LI>
<UL>
<LI><a href="#Admin">Admin</a></LI>
<LI><a href="#Everyone">Everyone</a></LI>
<LI><a href="#Analyst">Analyst</a></LI>
<LI><a href="#BusinessUser">Business User</a></LI>
<LI><a href="#Read">Read</a></LI>
</UL>
<LI><a href="#Topics">Topics</a></LI>
<LI><a href="#CreatingCustomRole">Creating a Custom Role</a></LI>
<LI><a href="#RemoveEditRole">Removing a User Role or Editing a Role Name</a></LI>
<LI><a href="#AddingUserstoRoles">Adding and Removing Users from Roles</a></LI>
<LI><a href="#AddingNewUser">Adding a New User</a></LI>
<LI><a href="#Spaces">Spaces</a></LI>
<UL>
<LI><a href="#ViewSpacesDetails">View Spaces Details</a></LI>
<LI><a href="#AddUsertoSpace">Add an Existing User to a Space</a></LI>
</UL>
<LI><a href="#BulkApply">Bulk Apply Role Privileges Within Dashboard Preferences Page</a></LI>
<LI><a href="#BulkApplyTopics">Bulk Apply Role Privileges Within Topic Preferences Page</a></LI>
</UL>
</div>
<HR>
<a name="ManagingOverview"></a>
Managing Permissions Overview
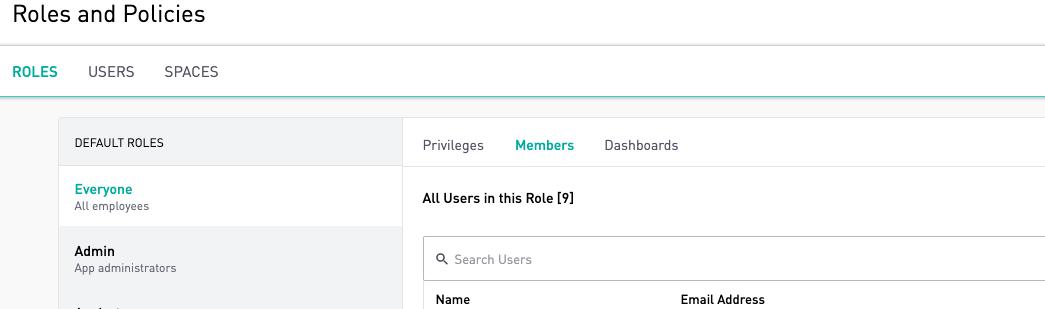
To view and modify existing user role settings, administrators can first click Settings menu in the bottom left hand corner.
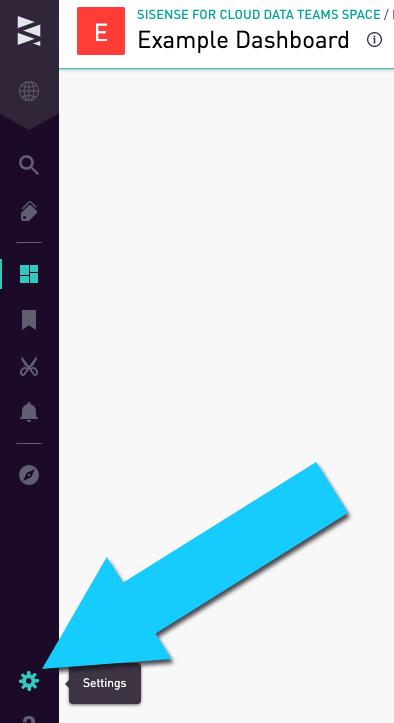
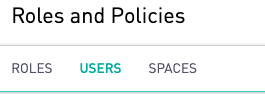
Then, click the Roles and Policies option:

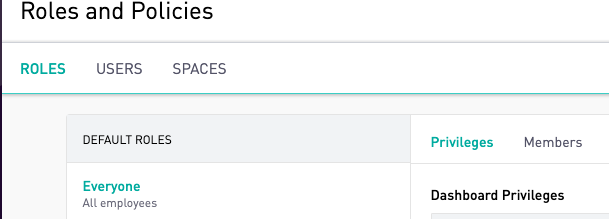
Then, click the Roles tab.
<a href="#top">Back to top</a>
<a name="RolePermission"></a>
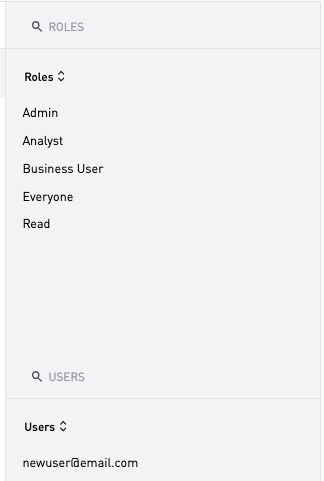
Default User Roles
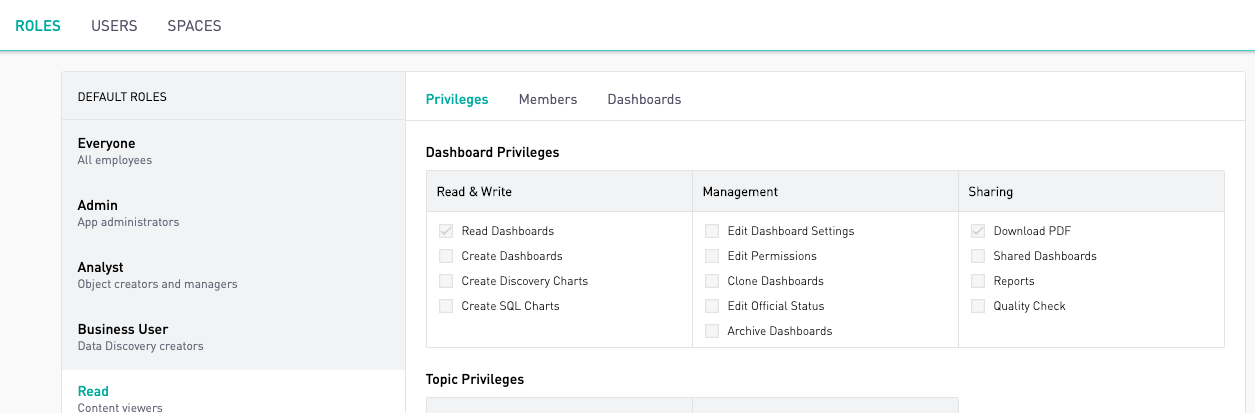
User roles are a great way to control user permissions and access within Sisense for Cloud Data Teams. Only admins can set up new user roles, change user role permissions, set topics privileges, and add and remove users from user roles.
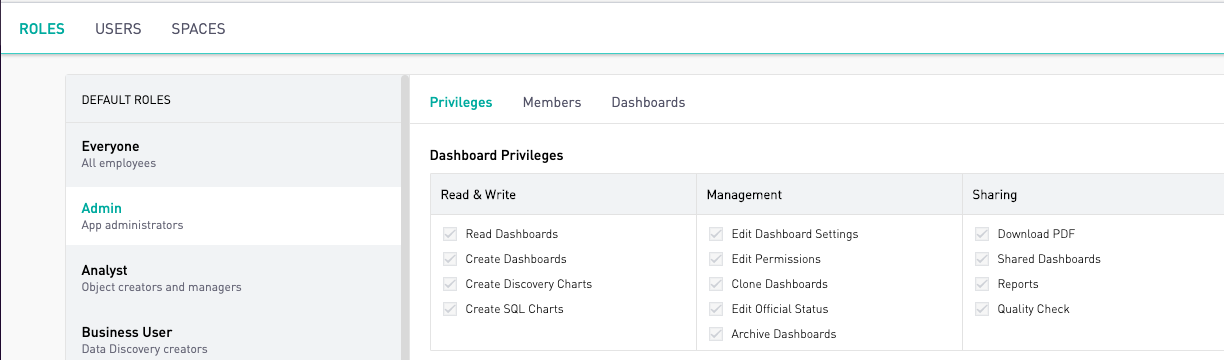
Each account has five built-in user roles: Admin, Everyone, Analyst, Business User and Read. The first user added to the account will be an administrator, and this user will be automatically added to the built-in Admin and Everyone user roles. Subsequent users will be added to the Everyone user role.
By default, both the Admin and Everyone roles have SQL access, allowing newly added users to easily create dashboards, views, and contribute to data analyses.
<a href="#top">Back to top</a>
<a name="Admin"></a>
Admin
To create an admin, an existing admin can add the user to the Admin user role.
<a href="#top">Back to top</a>
<a name="Everyone"></a>
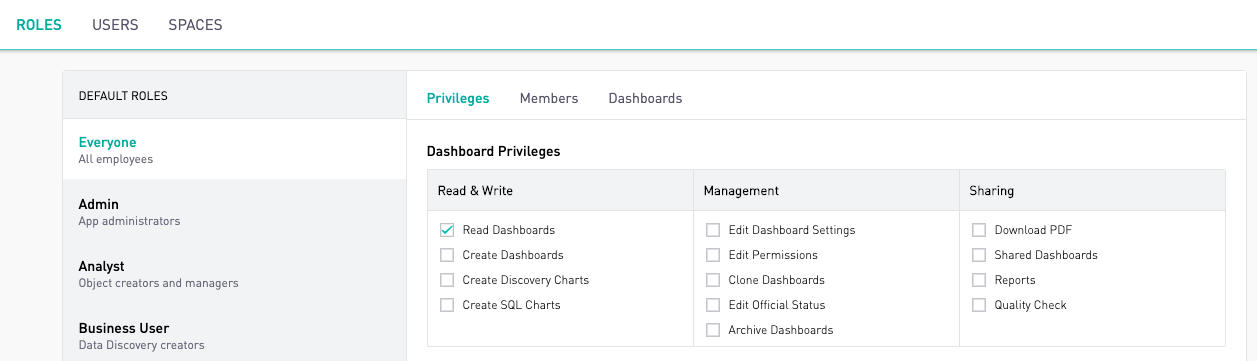
Everyone
By default, the Everyone role has SQL access, granting all users the ability to create and edit SQL and Discovery charts. This can be modified by unchecking the boxes:

<a href="#top">Back to top</a>
<a name="Analyst"></a>
Analyst
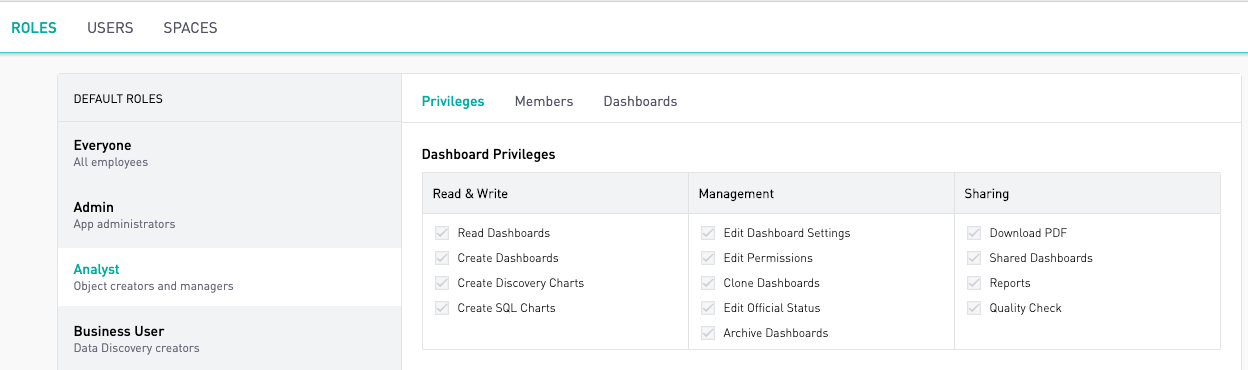
A user can create SQL and Discovery charts if they belong to the Analyst role. Assigning a user to the Analyst role gives the user the ability to edit and share dashboards.
<a href="#top">Back to top</a>
<a name="BusinessUser"></a>
Business User
A user can create and edit Discovery charts if they belong to the Business User role.

Note: The Discovery access level is only visible on instances with the Data Discovery feature. Site administrators interested in enabling the Data Discovery feature can reach out to their Account Manager.
<a href="#top">Back to top</a>
<a name="Read"></a>
Read
A user cannot access any underlying SQL or the Data Discovery interface if they do not belong to any roles that have SQL or Discovery access. To create a read-only user, the Everyone role must not have SQL or Discovery access, and the user must not be a member of any other Roles that have access to creating SQL or Discovery Charts.
To remove SQL and Discovery access to the Everyone role, first uncheck all access except Read Dashboards. Then, click Save. This will make the built-in Read role be Read only.
<a href="#top">Back to top</a>
<a name="Topics"></a>
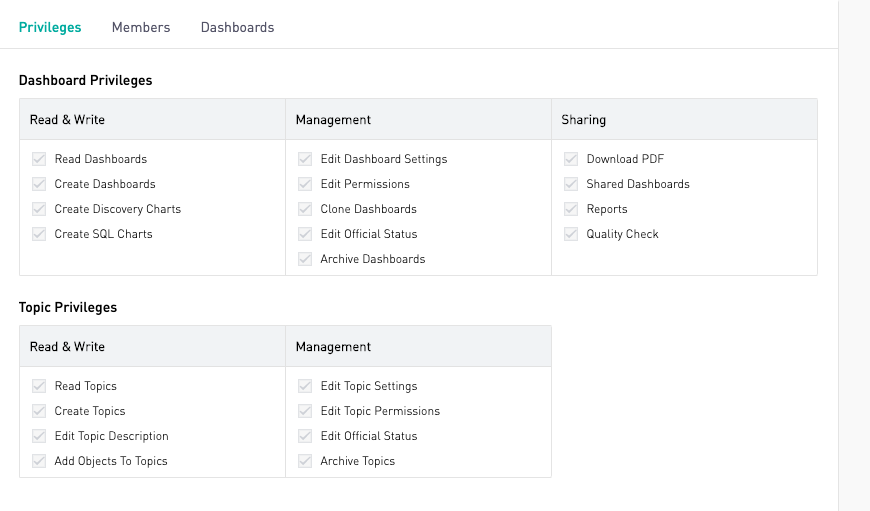
Topics
Admins can set topic privileges for each role as well. Permissions include both read and write privileges as well as management privileges.
<a href="#top">Back to top</a>
<a name="CreatingCustomRole"></a>
Creating a Custom Role
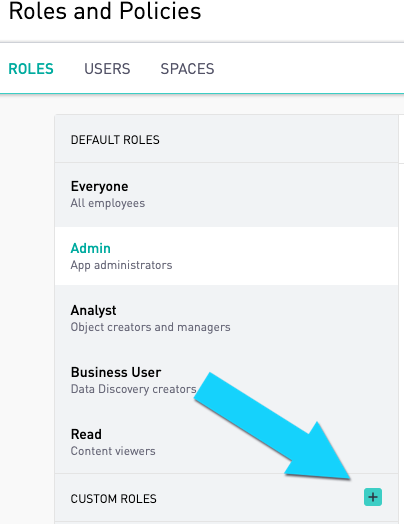
First, click the Site Settings gear icon to access account settings and click on Permissions. On the Permissions tab, click the green plus button to create a new custom user role. This provides an area to enter the role name and determines the level of access granted to users belonging to the role.
<a href="#top">Back to top</a>
<a name="RemoveEditRole"></a>
Removing a User Role or Editing a Role Name
Hovering over a custom role causes a pencil icon to appear on the right-side of the row. Click on the pencil icon to edit the name of the role and the role description.
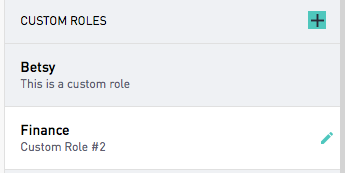
To remove a custom role, click on the role. Then click ‘Delete Role’.

The Admin, Everyone, Analyst, Business User, and Read roles are unable to be deleted and their names cannot be altered.
<a href="#top">Back to top</a>
<a name="AddingUserstoRoles"></a>
Adding and Removing Users from Roles
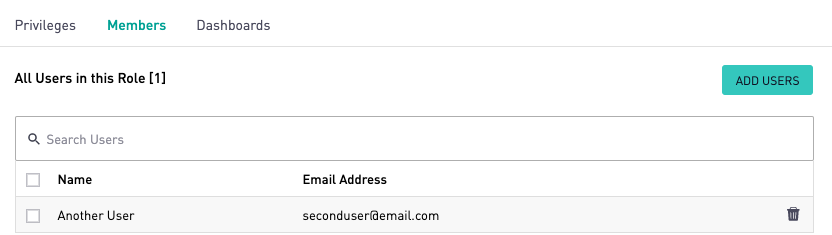
Clicking on a role opens the permissions allowed to this role. Click on the Members tab to view users that are associated with the selected role.
To add a user, click ‘Add Users’ on the Users tab from the selected role. To remove a user from the selected role click on the trash icon.
<a href="#top">Back to top</a>
<a name="AddingNewUser"></a>
Adding a New User
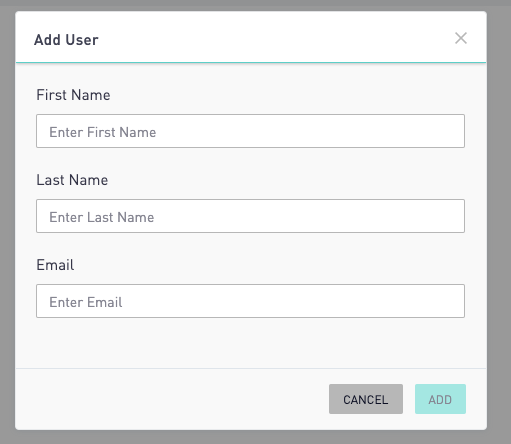
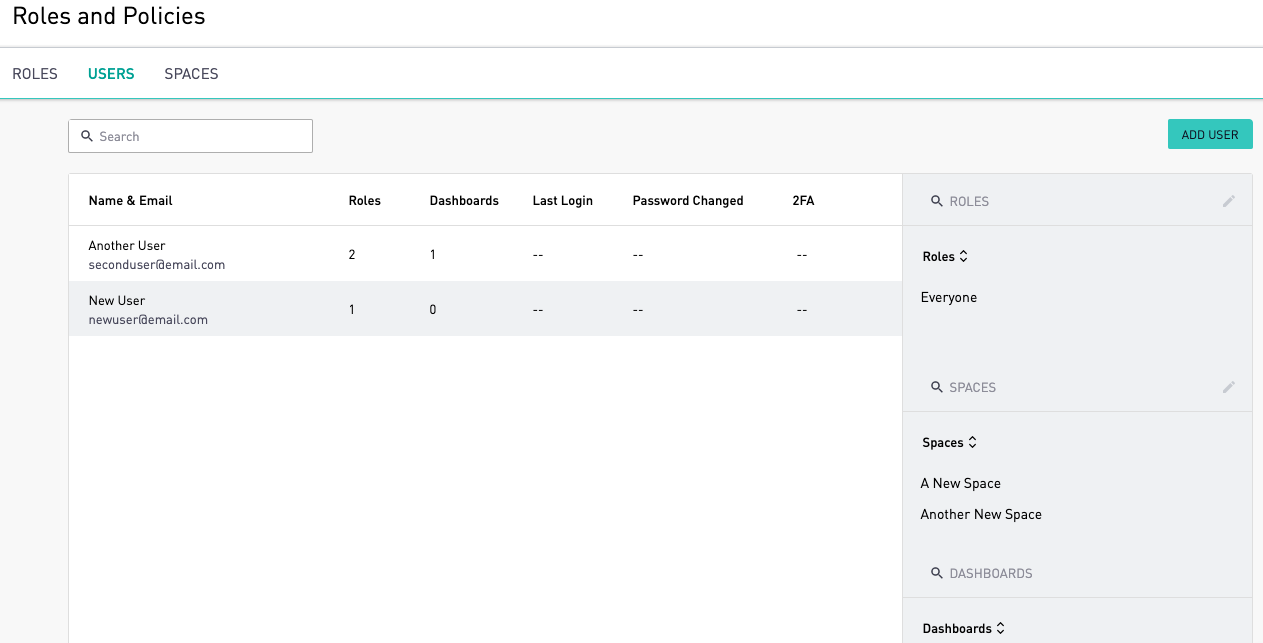
First, click the Site Settings gear icon to access account settings and click on Roles and Policies. On the Roles and Policies tab, click the User Tab. Then, click Add user button at the top right. This drops down an input form for the new user's name and email. Once that information has been entered, click Add to create the account.
After their account has been created, the newly added users will receive an automated email with a login link.
<a href="#top">Back to top</a>
<a name="Spaces"></a>
Spaces
RBAC allows Admins to view which spaces a user has access to as well as the roles the roles the user is assigned to in each space. Admins are also able to add existing users to spaces. Adding an existing user to a space will, by default, add that user to the Everyone role for that space.
<a href="#top">Back to top</a>
<a name="ViewSpacesDetails"></a>
View Spaces Details
To view the details of an existing space, or to create a new space, navigate to the Roles and Policies section in the Settings menu and click the Spaces tab. To add a new space, click on the green Add Space button.

To view the roles and users for a specific space, click on the name of the space in the menu and view the roles and users on the right.
<a href="#top">Back to top</a>
<a name="AddUsertoSpace"></a>
Add an Existing User to a Space
From the Roles and Policies option in the Settings menu, click the Users tab.
Click on the name of the user to highlight the data field and populate the roles, spaces and dashboard information in the menu on the right for that user.
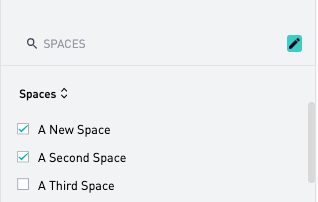
Click on the pencil icon next to the spaces search area to edit the spaces that the user is able to access.
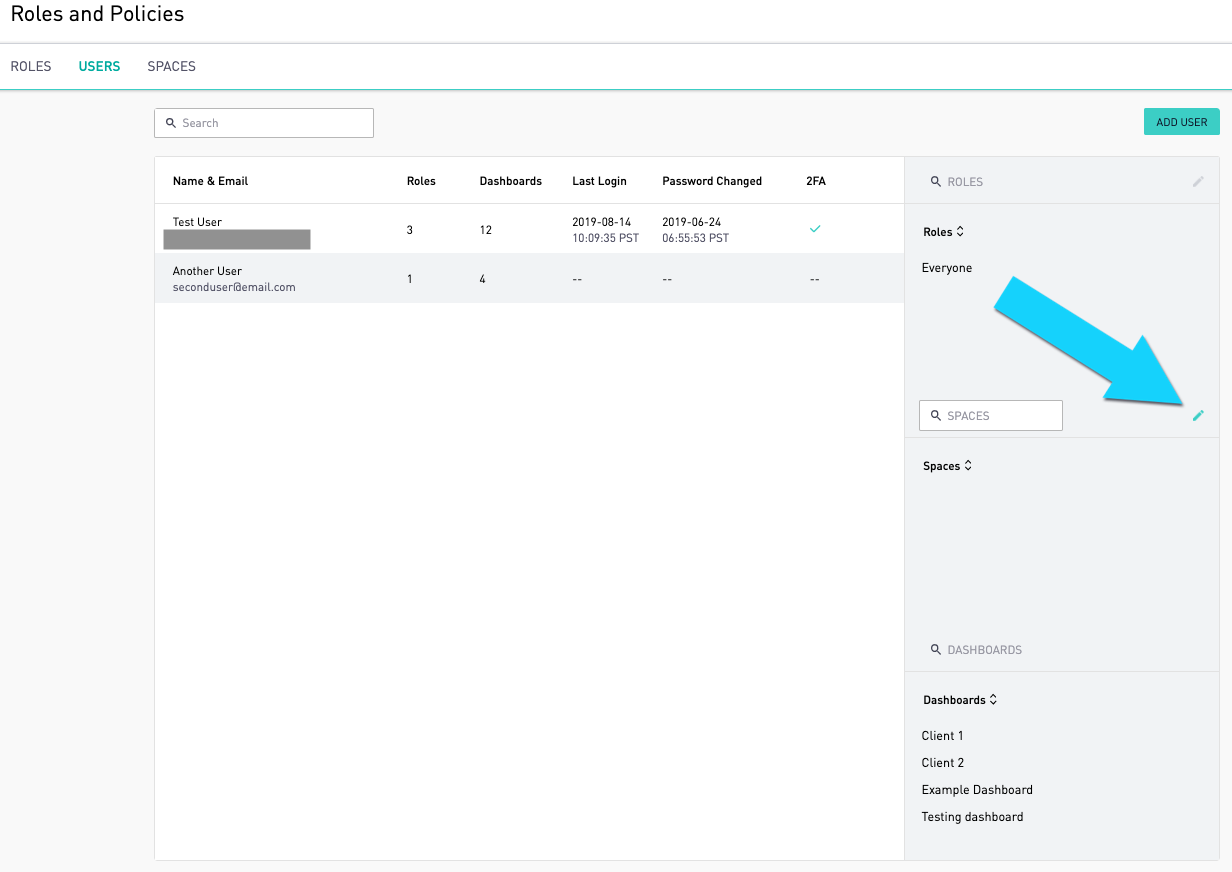
To add additional space for the user, click on the box next to the name of space.
When a user is added to a new space they will be added to the Everyone role by default. Changes to the roles for a user for a given space will need to be made by first navigating to that space and then making the necessary changes in the Roles and Policies option of the Settings menu.
<a href="#top">Back to top</a>
<a name="BulkApply"></a>
Bulk Apply Role Privileges Within Dashboard Preferences Page
Permissions for a dashboard can now be configured in accordance with the role privileges configured in Roles and Policies using the 'Apply Dashboard Privileges' button.
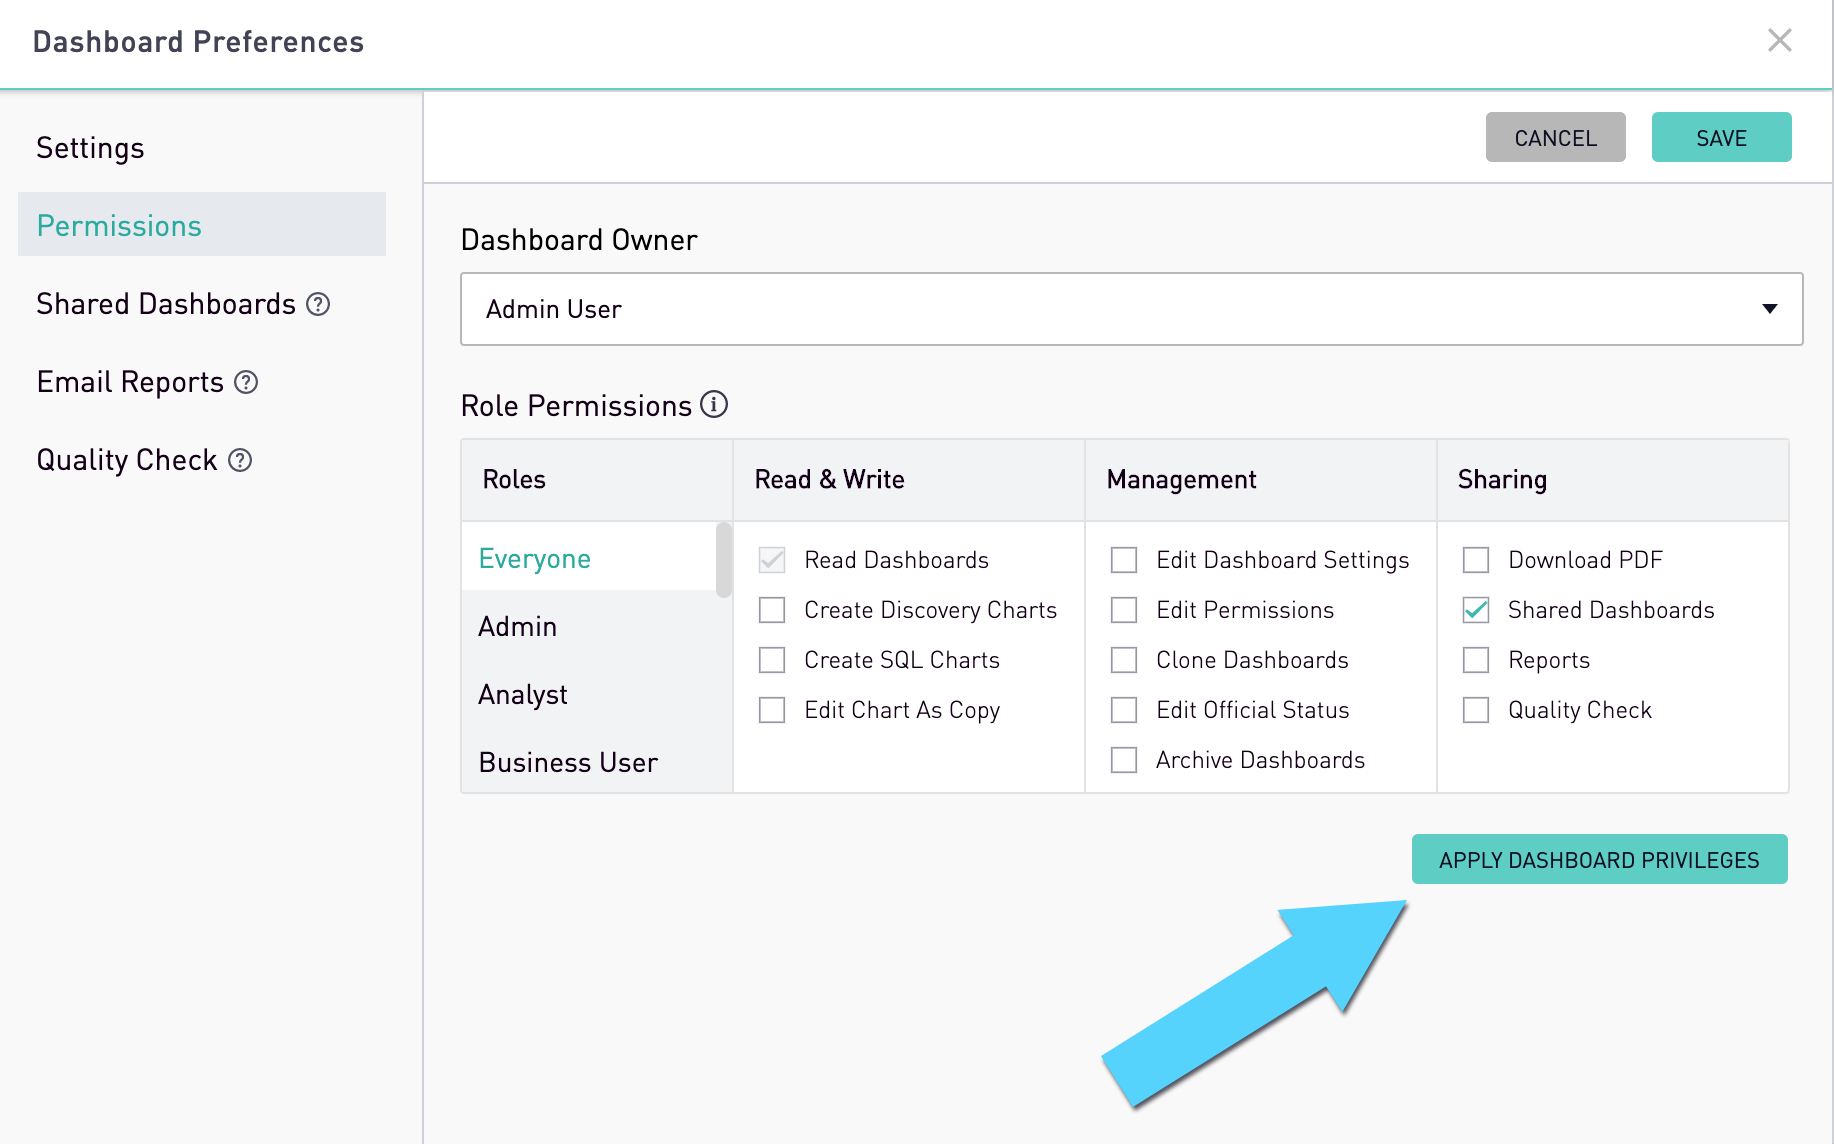
- Clicking this button will apply all check boxes configured under Roles and Privileges > Privileges for each role
- This includes the Everyone role.
- In order to NOT have Everyone Role permissions applied by using this button, Site Admins should uncheck all the boxes under Roles and Policies > Privileges> Everyone.
- There is also a tooltip for more information that can be seen by hovering over the information icon.
- Users with membership to a role that has Edit Permissions (within Roles and Policies) applied will have access to the 'Apply Dashboard Privileges' button on dashboards for which that role has dashboard privileges:
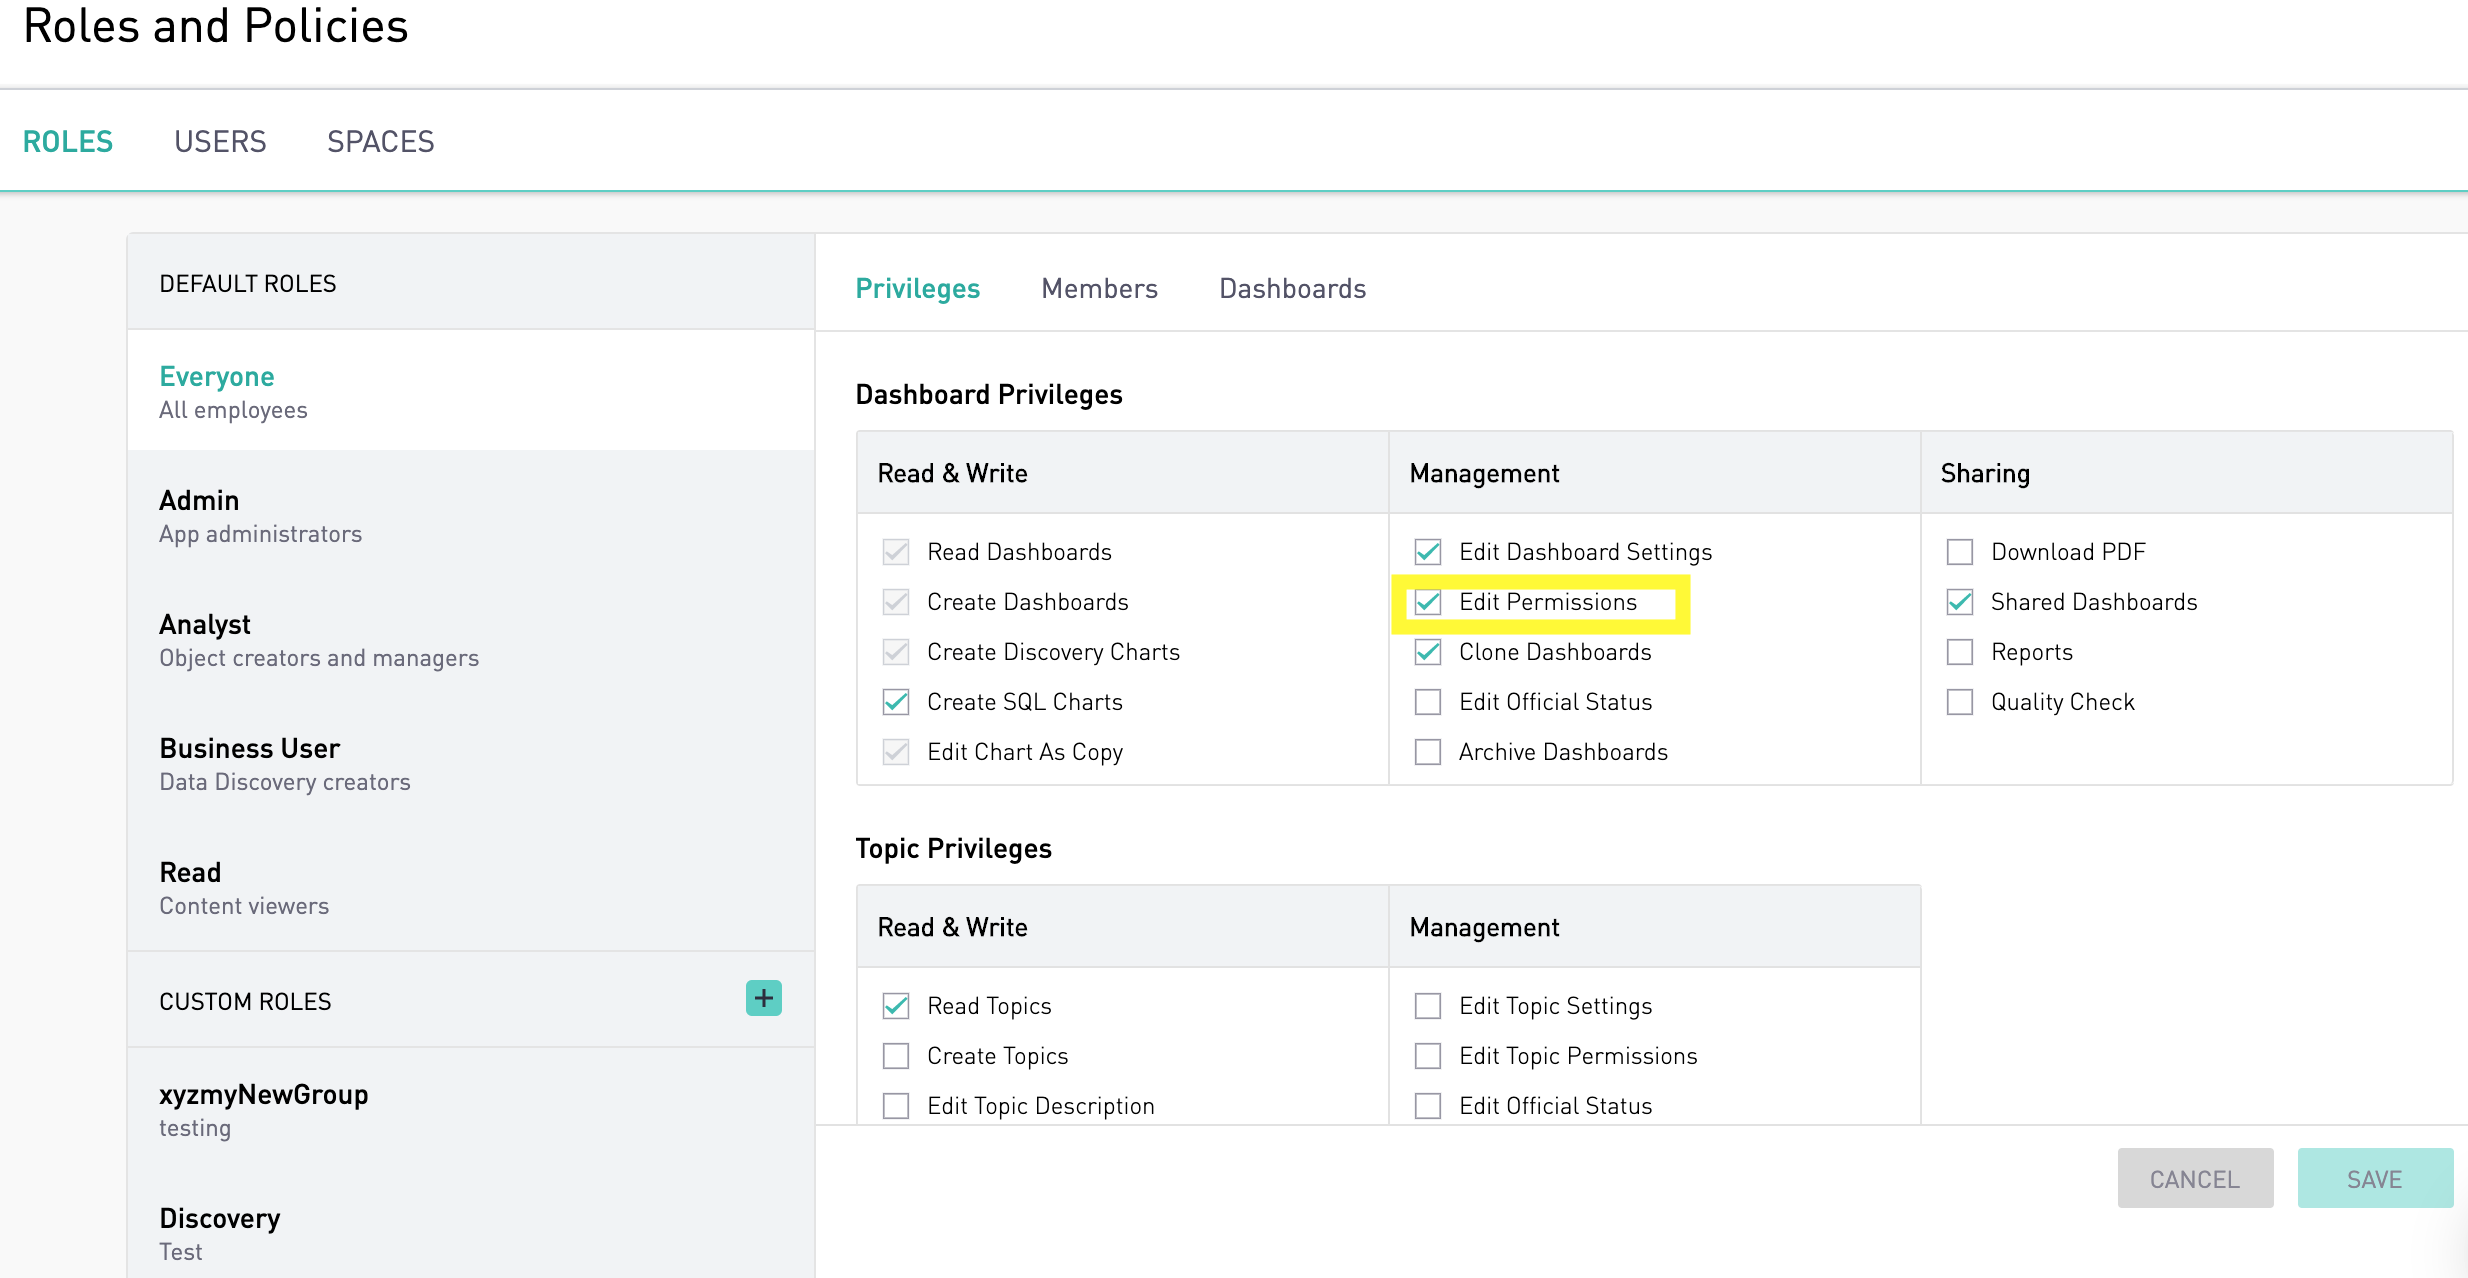
In the above screen shot the Everyone Role has the Edit Permissions privilege enabled.

Users in the Everyone Role will be able to access the 'Apply Dashboard Privileges' button for the Example dashboard based on their privileges for that dashboard as seen in the above screen shots.
<a href="#top">Back to top</a>
<a name="BulkApplyTopics"></a>
Bulk Apply Role Privileges Within Topic Preferences Page
Permissions for a topic can now be configured in accordance with the role privileges configured in Roles and Policies using the 'Apply Topic Privileges' button.

- Clicking this button will apply all check boxes configured under Roles and Policies > Topic Privileges for each role
- This includes the Everyone role.
- In order to NOT have Everyone Role permissions applied by using this button, Site Admins should uncheck all the boxes under Roles and Policies> Topic Privileges> Everyone.
- There is also a tooltip for more information that can be seen by hovering over the information icon.
- Users with membership to a role that has Edit Topic Permissions (within Roles and Policies) applied will have access to the 'Apply Topic Privileges' button.
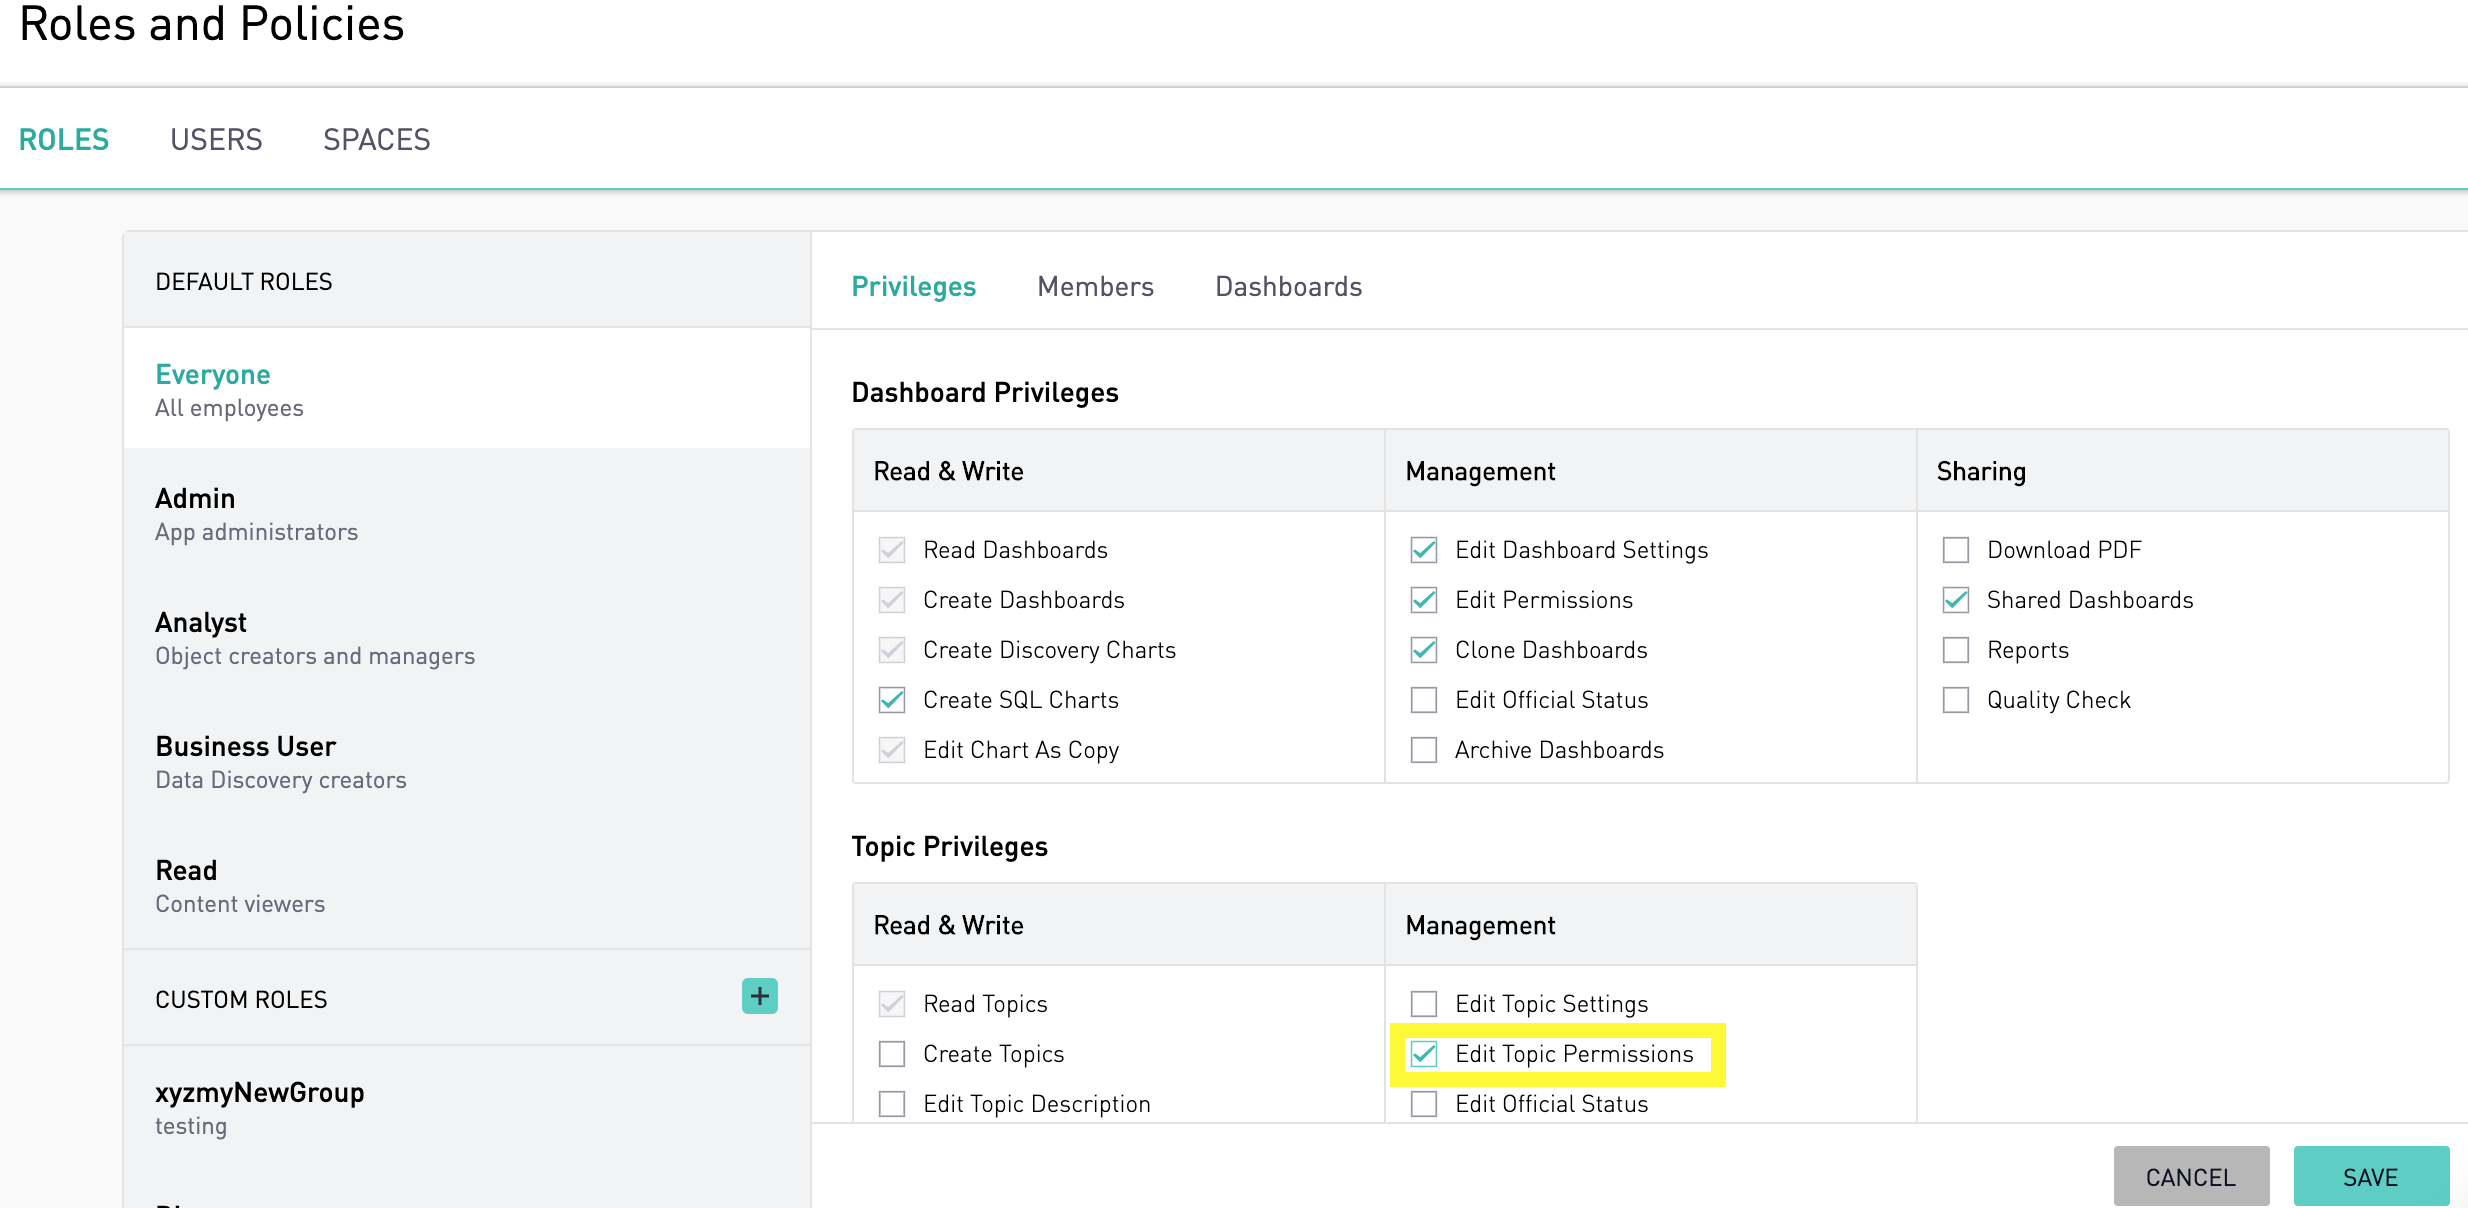
In the above screen shot the Everyone Role has the Edit Topic Permissions privilege enabled; members of this role will have access to the 'Apply Topic Privileges' button.