Workbooks (also known as Dashboards) Overview
The dashboard is Sisense's central reporting tool and serves as the main platform used for displaying charts.
<div><UL>
<LI><a href="#CreateDashboard">Creating a Dashboard</a></LI>
<LI><a href="#EditName">Editing a Dashboard Name</a></LI>
<LI><a href="#RefreshStatistics">Dashboard Refresh Statistics</a></LI>
<LI><a href="#ChangingOwner">Changing a Dashboard Owner</a></LI>
<LI><a href="#Grids">Dashboard Grids</a></LI>
<LI><a href="#SettingsMenu">Dashboard Settings Menu</a></LI>
<UL>
<LI><a href="#Preferences">Dashboard Preferences</a></LI>
<UL>
<LI><a href="#Settings">Dashboard Settings</a></LI>
<LI><a href="#SharedDashboards">Shared Dashboards</a></LI>
<LI><a href="#EmailReports">Emailed Reports</a></LI>
</UL>
<LI><a href="#Rearrange">Rearrange Charts</a></LI>
<LI><a href="#FullScreen">Full Screen</a></LI>
<LI><a href="#Filters">Filters on Dashboard</a></LI>
<LI><a href="#Clone">Clone Dashboard</a></LI>
<LI><a href="#PDF">Download PDF</a></LI>
<LI><a href="#Archive">Archive Dashboard</a></LI>
</UL>
</UL></div>
<HR>
<a name="CreateDashboard"></a>
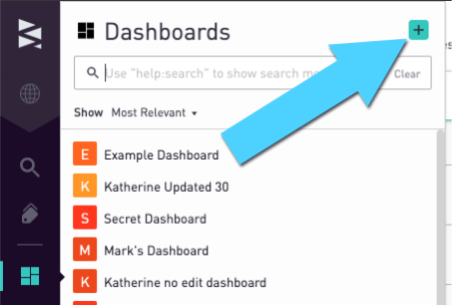
Creating a Dashboard
To create a new dashboard, first click on the Dashboard menu in the sidebar. Then, click the "+" button:
<a href="#top">Back to top</a>
<a name="EditName"></a>
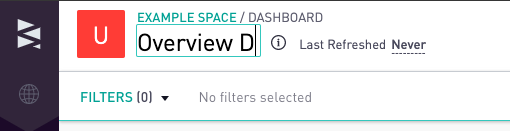
Editing a Dashboard Name
Changing the dashboard name can be done directly where the name is displayed:
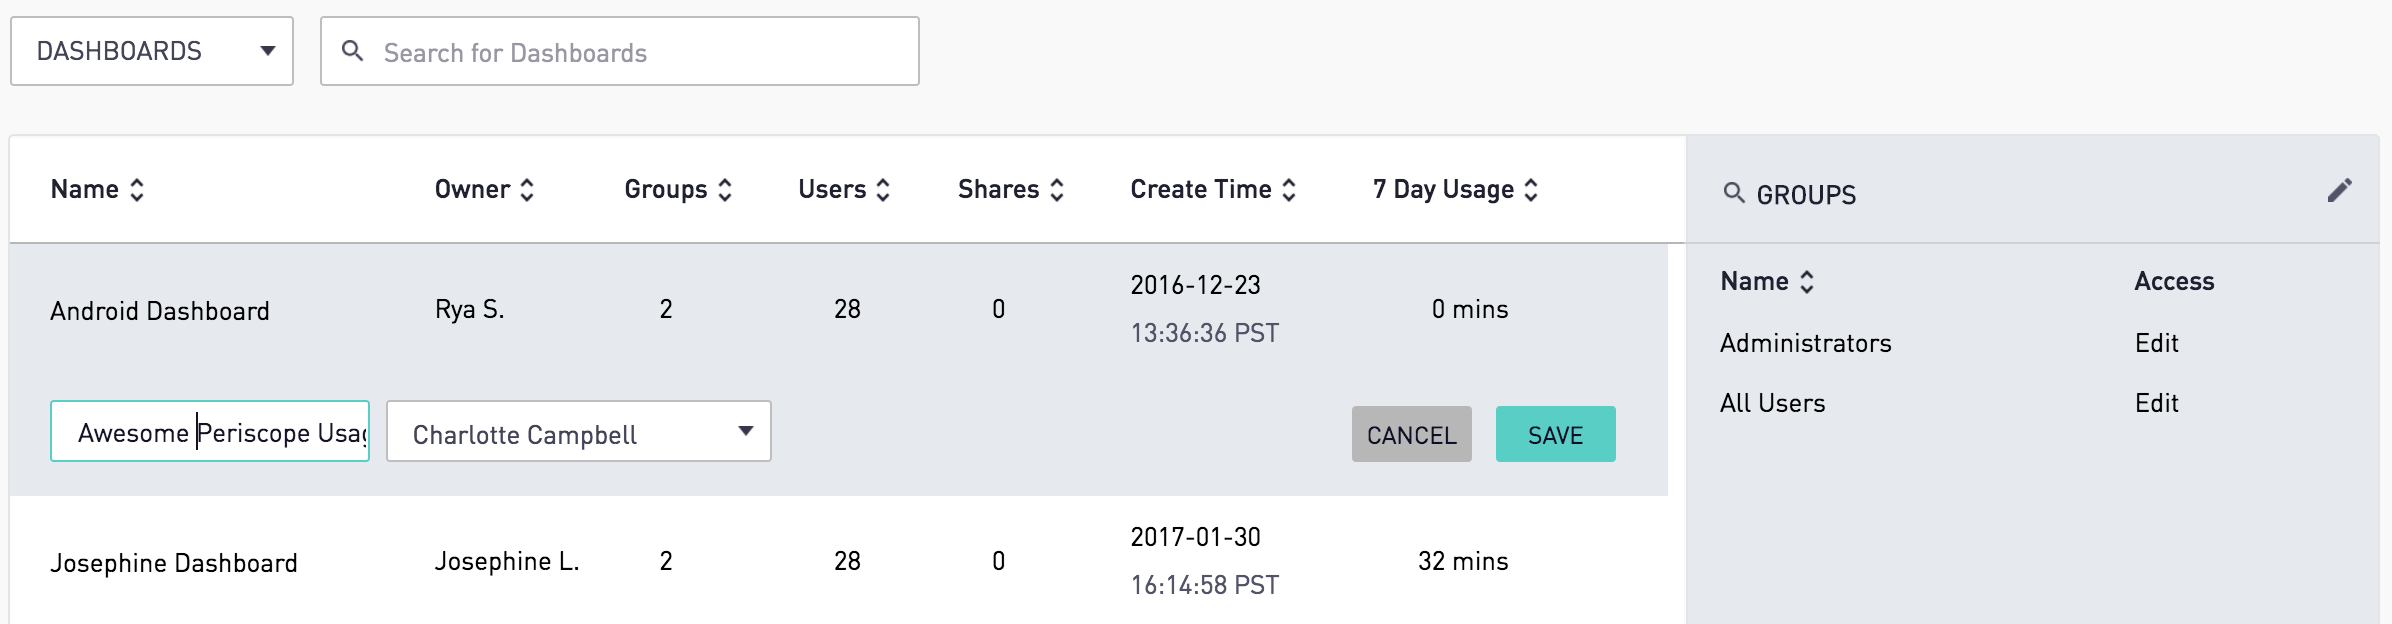
Dashboards can also be renamed from the Permissions Tab of the Settings menu. First, select Dashboards in the drop down for the list of dashboards.
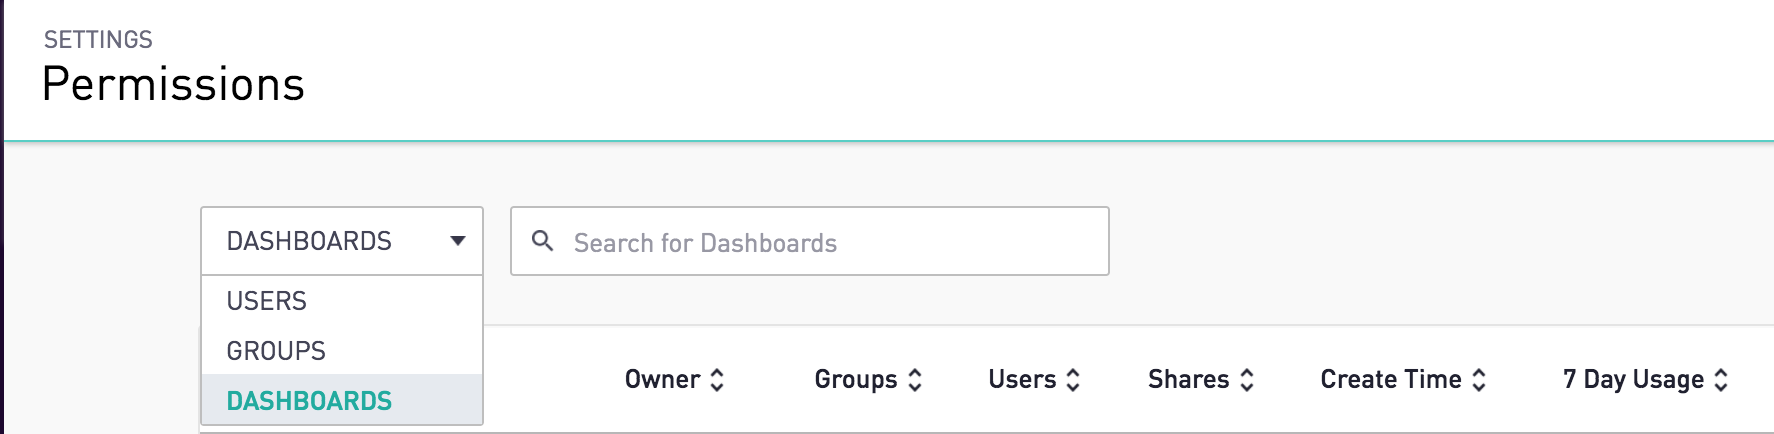
Then, select the gear next to the dashboard to be edited, and click Edit from the menu.
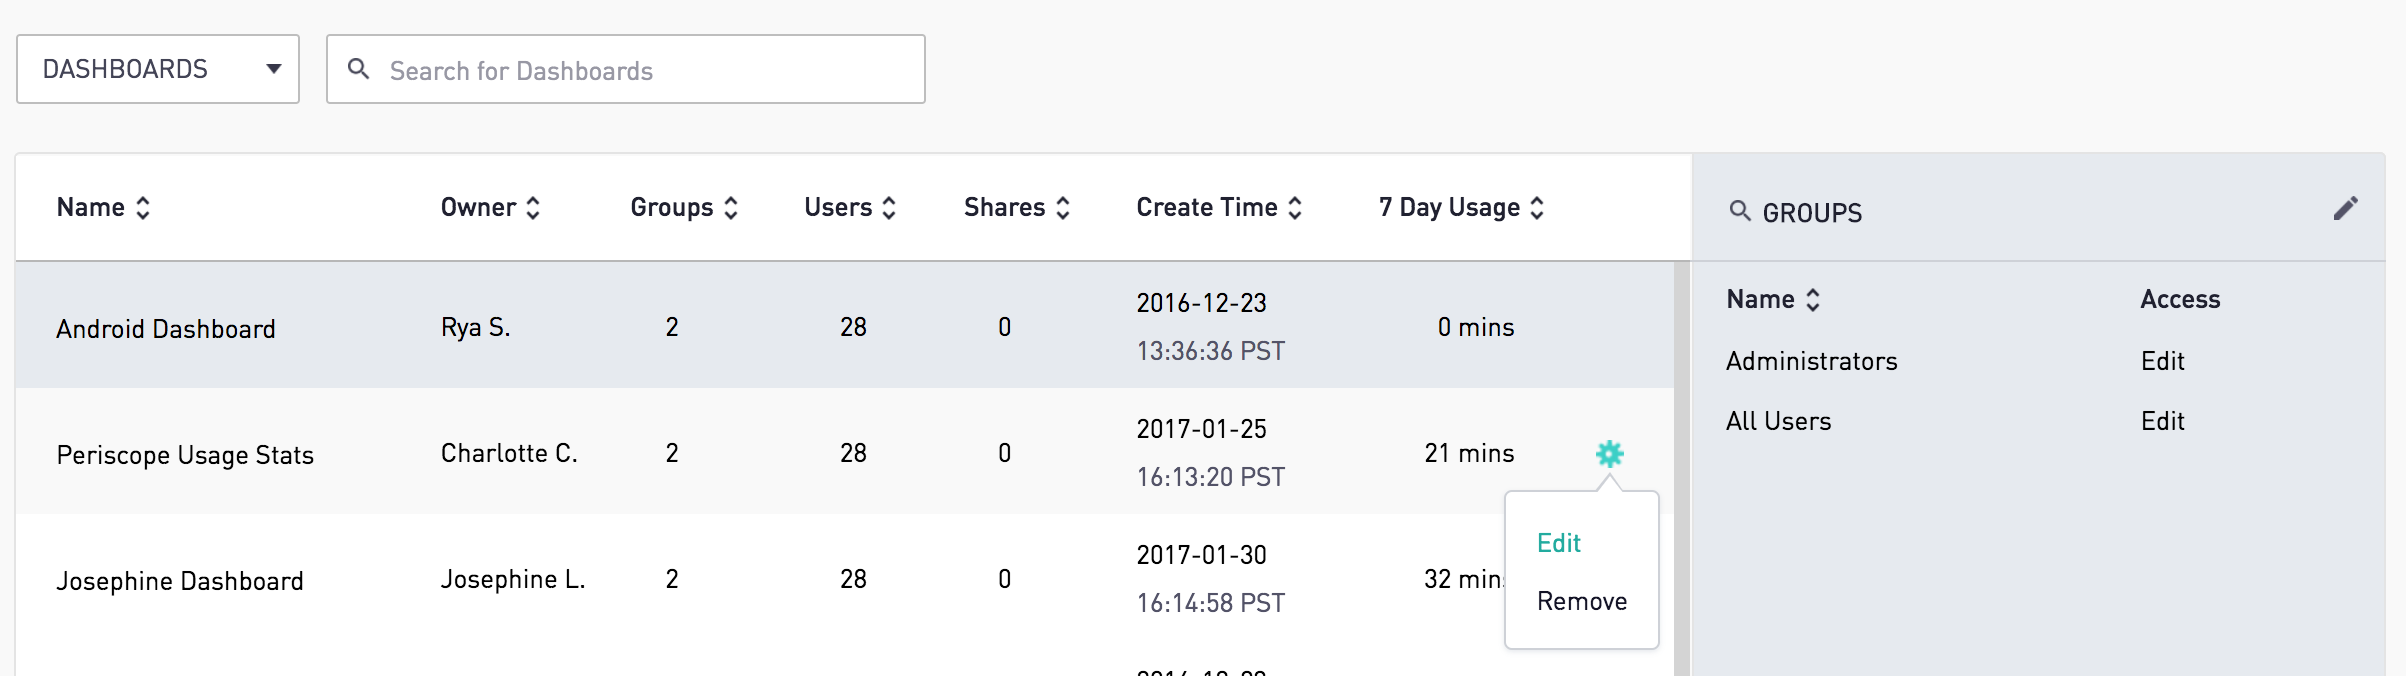
Here the name can be changed.
<a href="#top">Back to top</a>
<a name="RefreshStatistics"></a>
Dashboard Refresh Statistics
The informational 'i' icon displays the dashboard owner and the last time the dashboard has been refreshed:
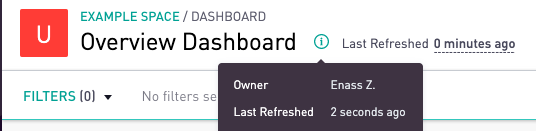
The refresh icon next to this 'i' icon can be used to refresh all of the charts on the dashboard.
<a href="#top">Back to top</a>
<a name="ChangingOwner"></a>
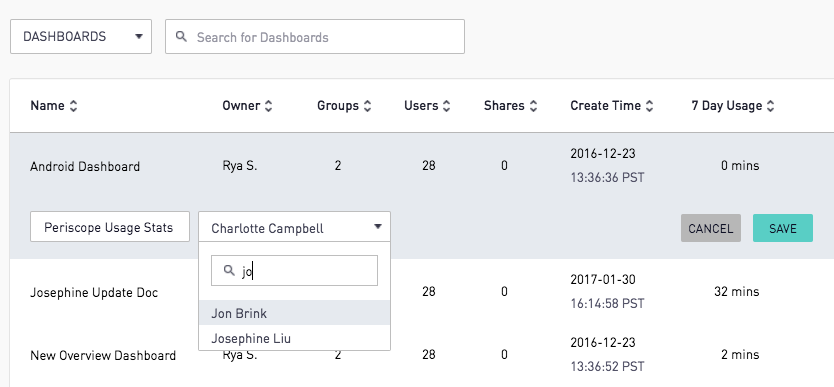
Changing a Dashboard Owner
Changing the dashboard owner can be done from the Permissions Tab of the Settings menu. First, select Dashboards in the drop down for the list of dashboards. Select the gear next to the dashboard you'd like to edit, and click Edit from the menu.
Here a user can be searched for and selected as the new dashboard owner.
<a href="#top">Back to top</a>
<a name="Grids"></a>
Dashboard Grids
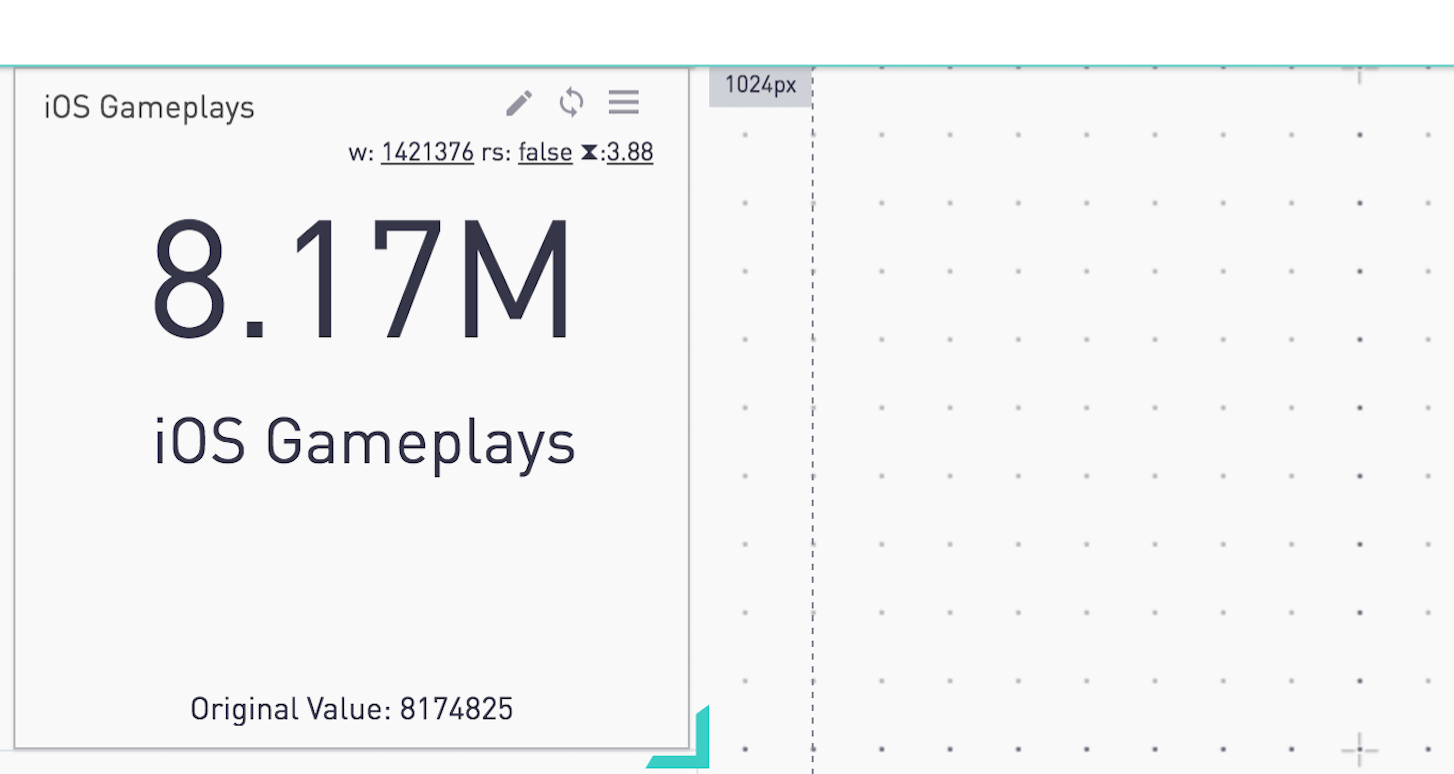
The dashboard is made of small grid squares that span a lattice on the page. Charts are autofitted to grid squares to provide the best view for sizing and organization. Grid squares appear when resizing a chart to help guide the user.
Adjusting and Rearranging Charts on the Dashboard
Charts can be resized directly on the dashboard by dragging and dropping the bottom right corner of the charts. Charts will lock to underlying grid squares.
To rearrange the ordering of charts, simply hover over the title area of the chart for the drag icon to appear, and charts can be moved and pushed around the dashboard. Another option to rearrange charts for the whole dashboard can be found in the Dashboard Preferences section of the dashboard settings menu.
<a href="#top">Back to top</a>
<a name="SettingsMenu"></a>
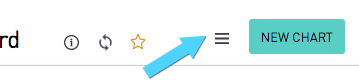
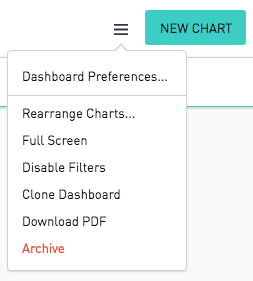
Dashboard Settings menu
The dashboard settings menu can be found at the top right corner of the screen, next to the New Chart button.

<a href="#top">Back to top</a>
<a name="Preferences"></a>
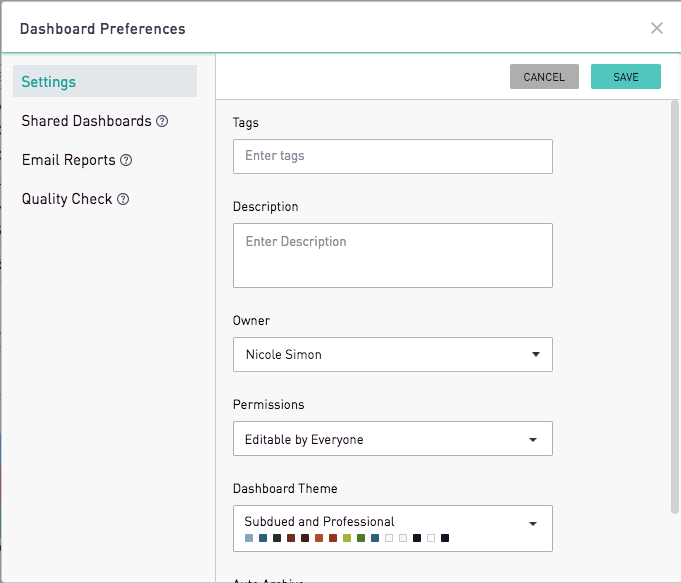
Dashboard Preferences
<a name="Settings"></a>
Settings
The Settings tab in the Dashboard Preferences provides a list of general dashboard settings.
- Dashboard Description - Add a description to the dashboard to be referenced in the future.
- Permissions - Change the permission for viewing and editing this dashboard.
- Tags - Categorize this dashboard by giving it a tag. For more information, see the documentation within Organizing Dashboards.
<a name="SharedDashboards"></a>
Shared Dashboards
Dashboards can be shared externally with different filter settings. For more information, see the documentation.
<a name="EmailReports"></a>
Emailed Reports
Edit users on the dashboard can schedule dashboards to be emailed regularly with the default filter settings. For more information, see the documentation.
<a href="#top">Back to top</a>
<a name="Rearrange"></a>
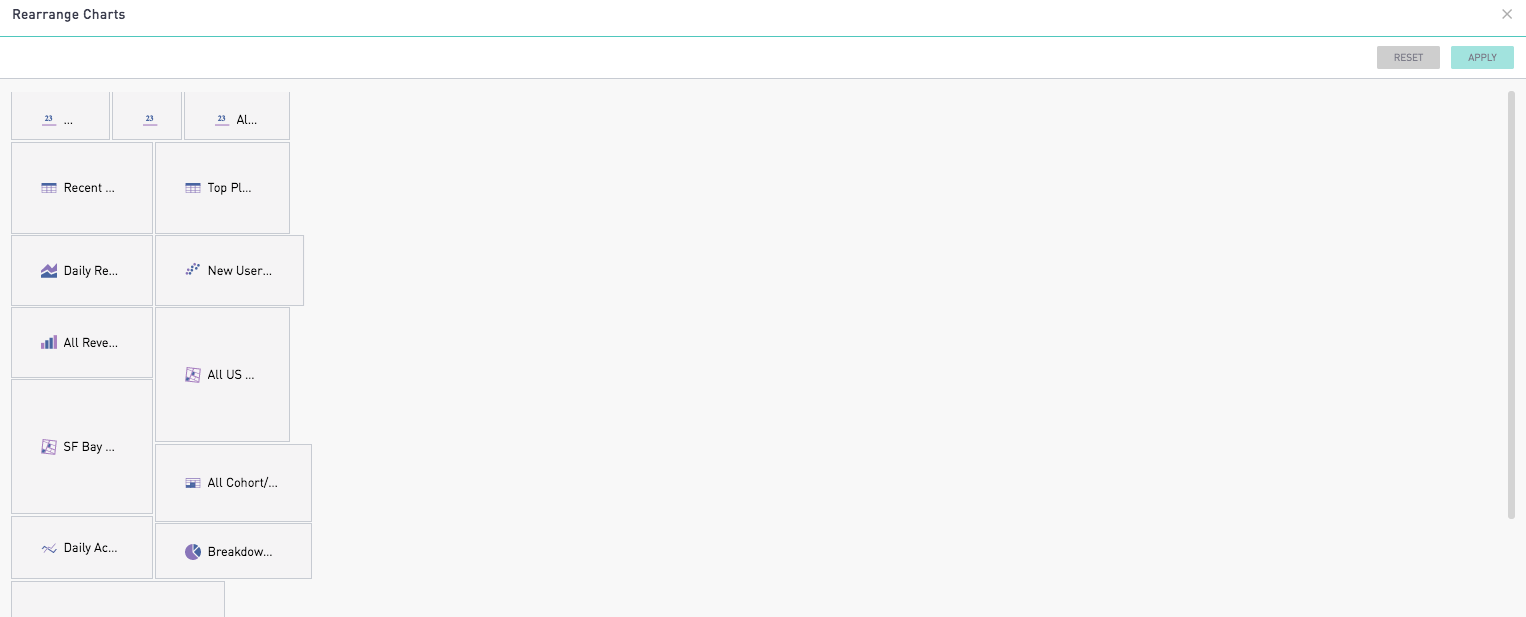
Rearrange Charts
Rearranging charts can be easily done through the bird's eye view in the Rearrange Charts option.
More in Dashboard Organization
<a href="#top">Back to top</a>
<a name="FullScreen"></a>
Full Screen
To go full screen, click the dashboard settings menu and choose the Full Screen option. Full screen mode is perfect for displaying the dashboard on a TV.
If SSO is enabled for the site, the Full Screen option will not be available. However, its behavior can be imitated by going full-screen from the browser and appending "?tv_mode_frame=true" to the end of the URL.
<a href="#top">Back to top</a>
<a name="Filters"></a>
Filters on Dashboard
The filter bar on dashboards can be turned on or off. In the dashboard settings menu, the Enable/Disable Filters option can be used to turn on and off this bar. If the Disable Filters option is gray, that indicates the filters are being used in charts on this dashboard.
<a href="#top">Back to top</a>
<a name="Clone"></a>
Clone Dashboard
To create a copy or duplicate of the dashboard, click the Clone option in the dashboard settings menu. The new dashboard will be automatically renamed with the New prefix.
<a href="#top">Back to top</a>
<a name="PDF"></a>
Download PDF
Note: The Download PDF feature is an add-on available on selected plans. Site administrators can contact their Account Manager for additional information.
To download a PDF of the dashboard, click the Download PDF option in the dashboard settings menu.
For more information on enabling and formatting dashboards, see our Downloading PDF Documentation here.
<a href="#top">Back to top</a>
<a name="Archive"></a>
Archive Dashboard
If a dashboard is no longer needed, it can be archived from the dashboard settings menu:
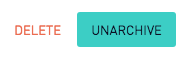
After confirming, this dashboard will be archived and it will no longer appear in the search menu. More information on archiving objects can be found here.
An archived dashboard can be searched for and found via the standard search boxes in the left-hand navigation.The syntax to use is 'in:archived' in the search.
If a dashboard needs to be used after archiving, it can be unarchived by clicking the green 'Unarchive' button in the upper right-hand corner.
If a dashboard should be fully removed after archiving, it can be deleted using the "Delete" button in the upper right hand corner. After confirming, this dashboard will be deleted permanently.
<a href="#top">Back to top</a>